Configuring BizTalk 2006 R2 for AS2: Part 2 Installing Certificates
This time around we will take a look at installing certificates that we
created in Part 1. We will start by opening the Microsoft Management
Console. Make sure that you are logged in using the account that the
BizTalk services runs under. Click on Start | Run and type in mmc.exe
when it prompts for a program to run. Once in the MMC, click on File |
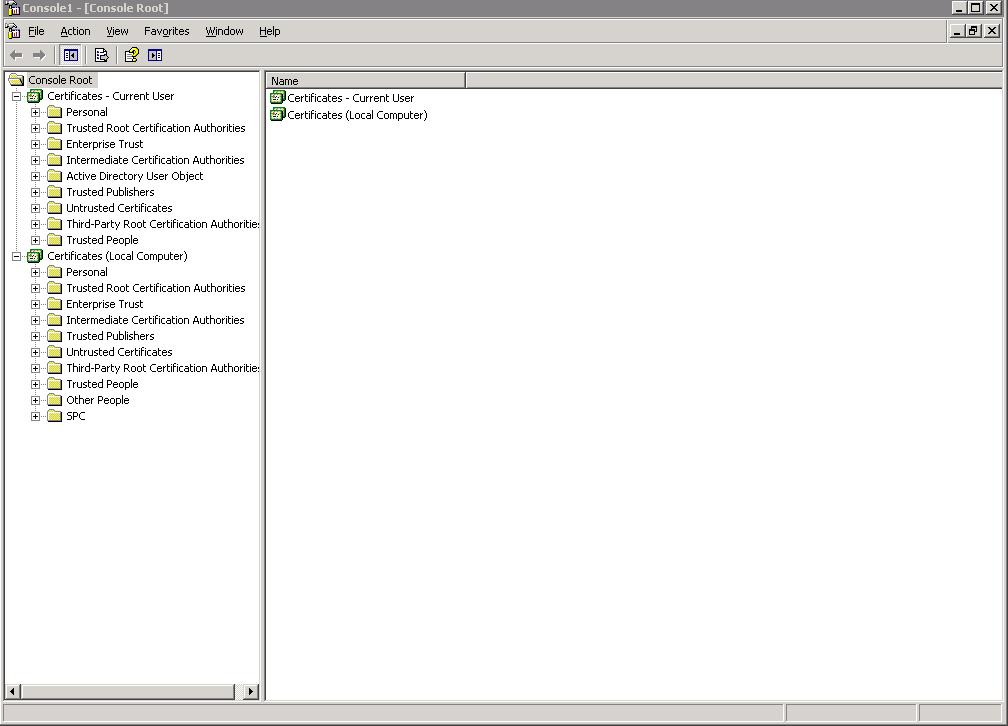
Add/Remove Snap-in. We now need to add the Certificate management
snap-in twice, once for the current user and once for the local
computer. When completed, it should look something like this:

Import the .pfx key into the personal certificate store of the current
user. Right-click on Personal folder and choose Import. If you have any
public certificates from your trading partners, import them into the
Other People folder under the local computer certificate store. In the
future as you add additional trading partners you will need to add their
public certificates to this store. The .cer file is given to each of
your trading partners so they can decrypt and verify the messages that
you send to them.
This part was pretty short, but it completes the prerequisite tasks
needed to setup BizTalk. In part three we will start configuring BizTalk
itself by creating the AS2 receive endpoint. I will try not to take as
long this time between posts.